“Let Nature in” Shower Curtain Makeover
Hope you enjoy this project I created/submitted for my November Janome project submission.

A fun reminder of summer walks, warm days and nature, was the inspiration for the project I bring you today. There is plenty of sun and gorgeous leaves hanging on, but we know that it is sweater weather and hot chocolate time!
I love parts of Autum/winter but I don’t decorate for it, that is until this project popped into my head. I see beautiful décor everywhere but there is one room that seems to get forgotten; I’m here to remedy that with a simple, interactive project for the bathroom. Start with a plain-ish cloth shower curtain and applique leaves on it for a quick bathroom make-over the whole family can take pride in.
I always try to think of projects that involve the entire family to provide “screen free” time for my teen. Feel free to go for a walk around the neighborhood collecting eye-catching leaves in different shapes and sizes to trace for this project. Let’s get started!
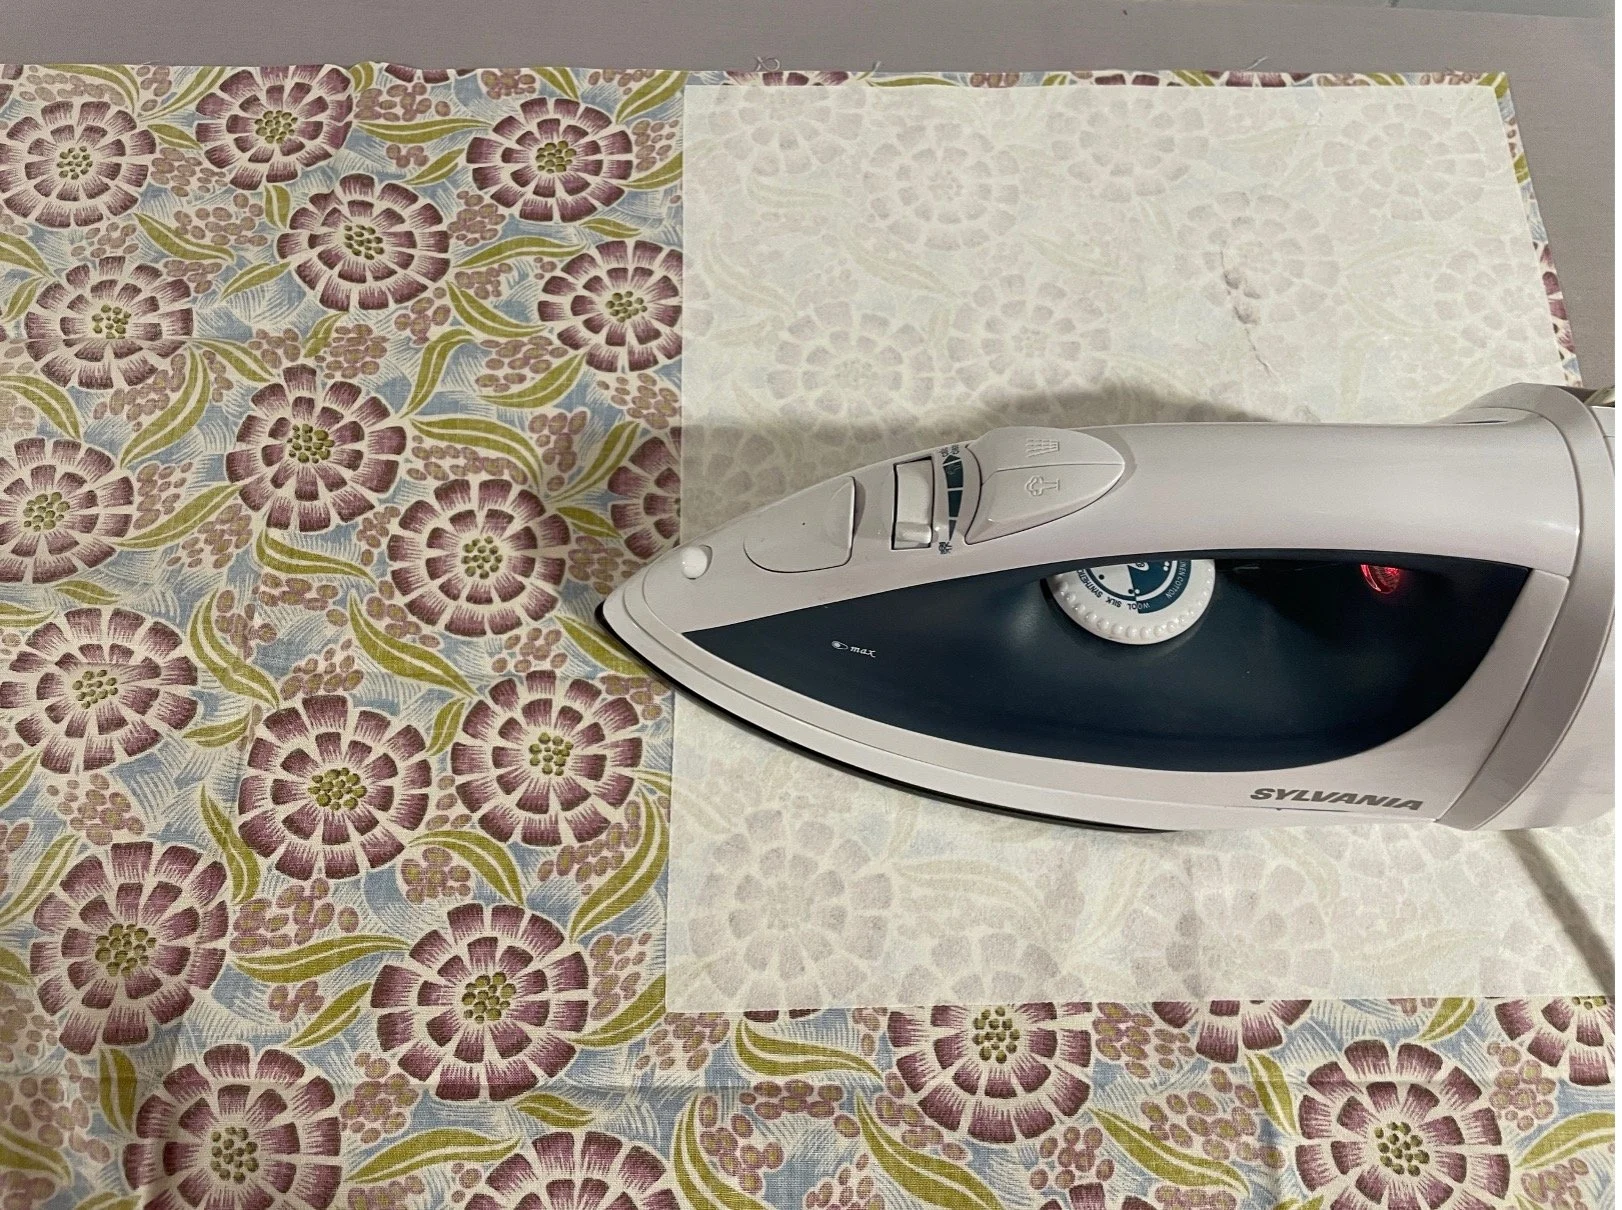
Helpful Hints: Double sided fusible web has paper on both sides. You will peel only side at a time. Unusual fabric prints make for interesting leaves. Lay a simple fabric scrap on the ironing board to protect it while using double sided fusible web items.
Supplies:
Cotton scraps in assorted colors (leaves)
Cotton thread 50 wt (favorite colors)
Janome needle blue tip
Assorted natural leaves in different sizes
Blank cloth shower curtain (I used a white, pottery barn curtain I have had since 2008)
Pencil/Pen for tracing
1 yard of double-sided fusible web (steam a seam 2 is an option)
Sharp scissors
Iron/ironing board/Best press starch
Machine
Janome M7 Continental
Satin stitch Foot F and zig zag plate
1. Go on a scavenger hunt to collect interesting leaves. Perhaps you can find them in your yard or local park. It’s fun identifying trees as you go along, especially if you have company during your walk.

2. Peel the paper from only one side of the double-sided fusible web (like steam a seam 2) and attach to the wrong side of the fabric scrap that you are using for your different leaves. You might be using different scrap colors so you will repeat this step for each leaf. I pressed down with my iron very lightly to secure it to the fabric. Hint: Do not leave the iron down for too long. Please note that your iron is on paper and not glue. The glue side attaches to the fabric.
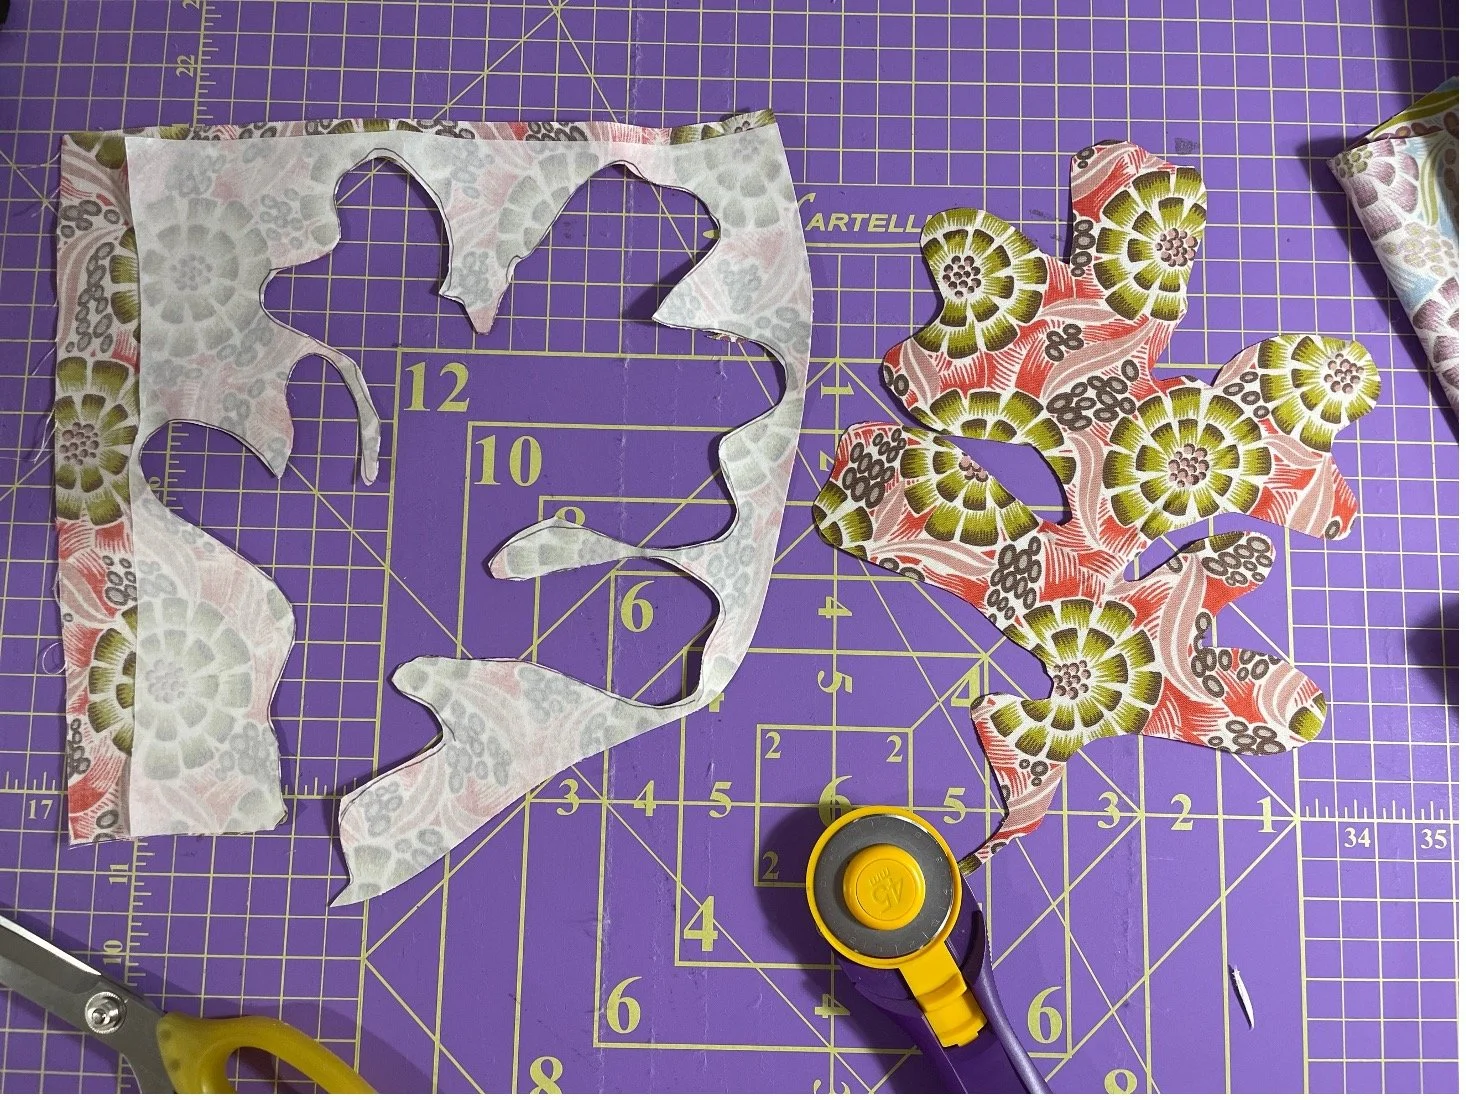
3. Now you are ready to trace leaves on the paper side. Have Fun!

4. Cut out your leaves with sharp scissors. I had a total of thirteen. Hint: This task is perfect for a short screen-time recess or boredom buster.
5. A curtain rod with clips acted as a design wall holder for my blank shower curtain. It’s great for keeping my progress off the floor and save my back J Hint: Be prepared to use lots of best press to get as many wrinkles out as possible, while ironing.
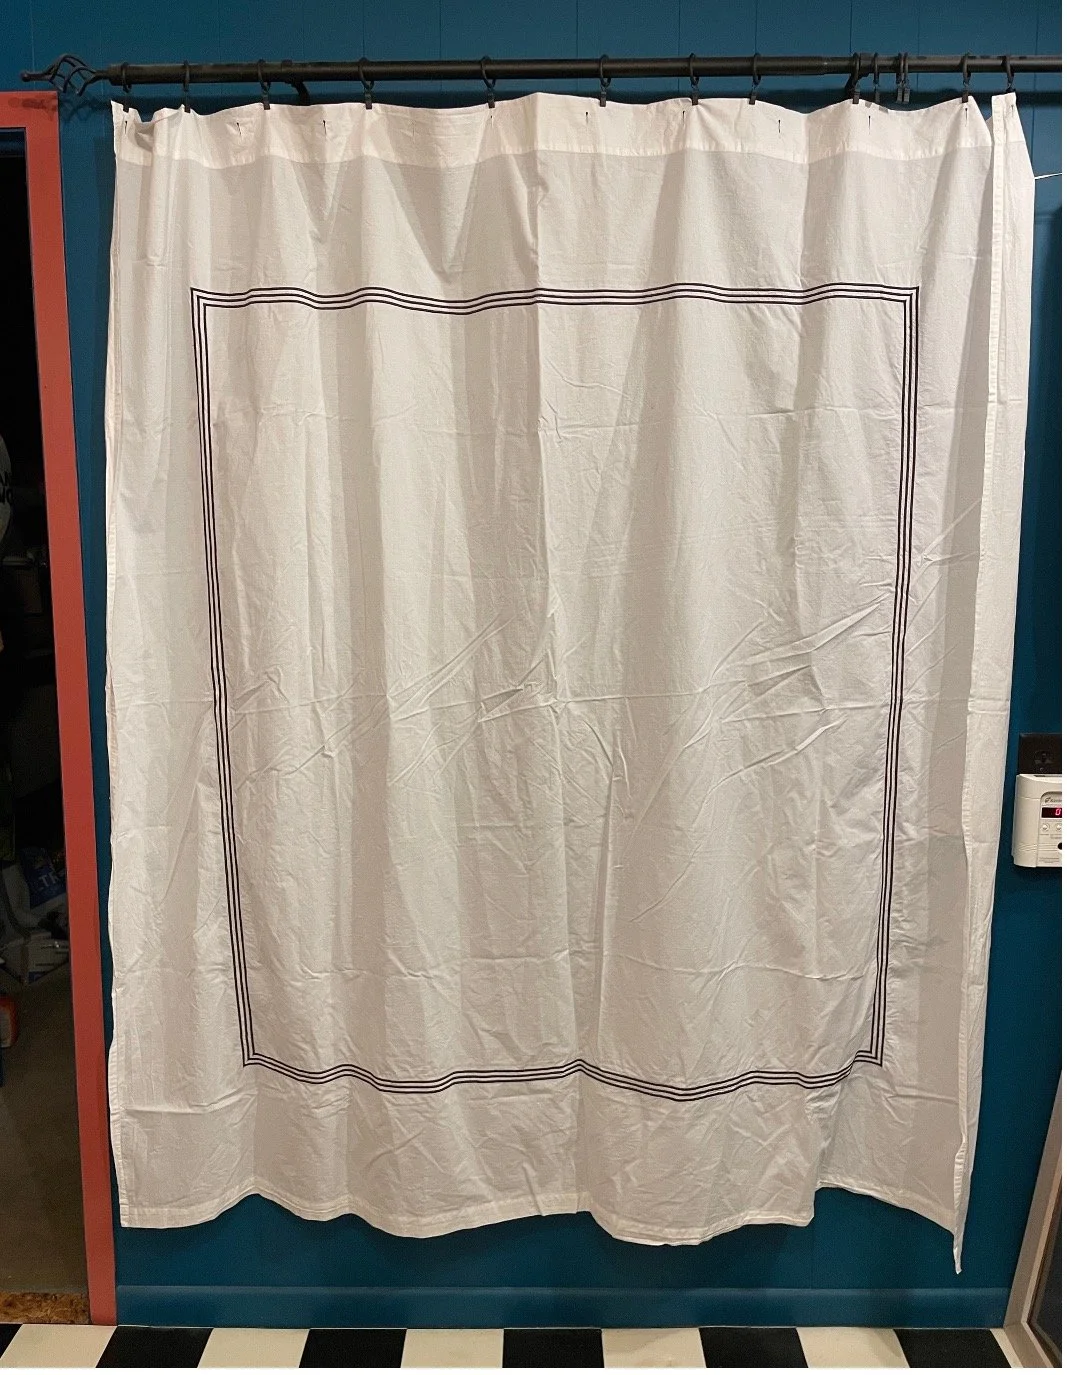
6. Remove paper backing from each “freshly cut” leaf and iron to shower curtain. Transfer it to your shower stall to ensure that you are satisfied with the placement and how it looks. Decide if you would like to add more leaves. If you like the way it looks, you are ready for machine stitching!

7. Select your favorite applique stitch and using the Satin Stitch foot F (with red triangle guide), stitch around each leaf to secure to the curtain. Take your time going around curves. Hint: The M7 continental also shows you the correct foot to use, on the screen, for each stitch.

8. Line up the guide on the foot (to the right of the red triangle) with the edge of the leaf to start appliqueing on the right side, as shown below.
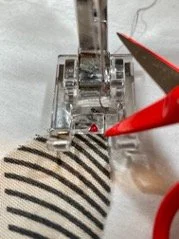
Appliqué foot with guide
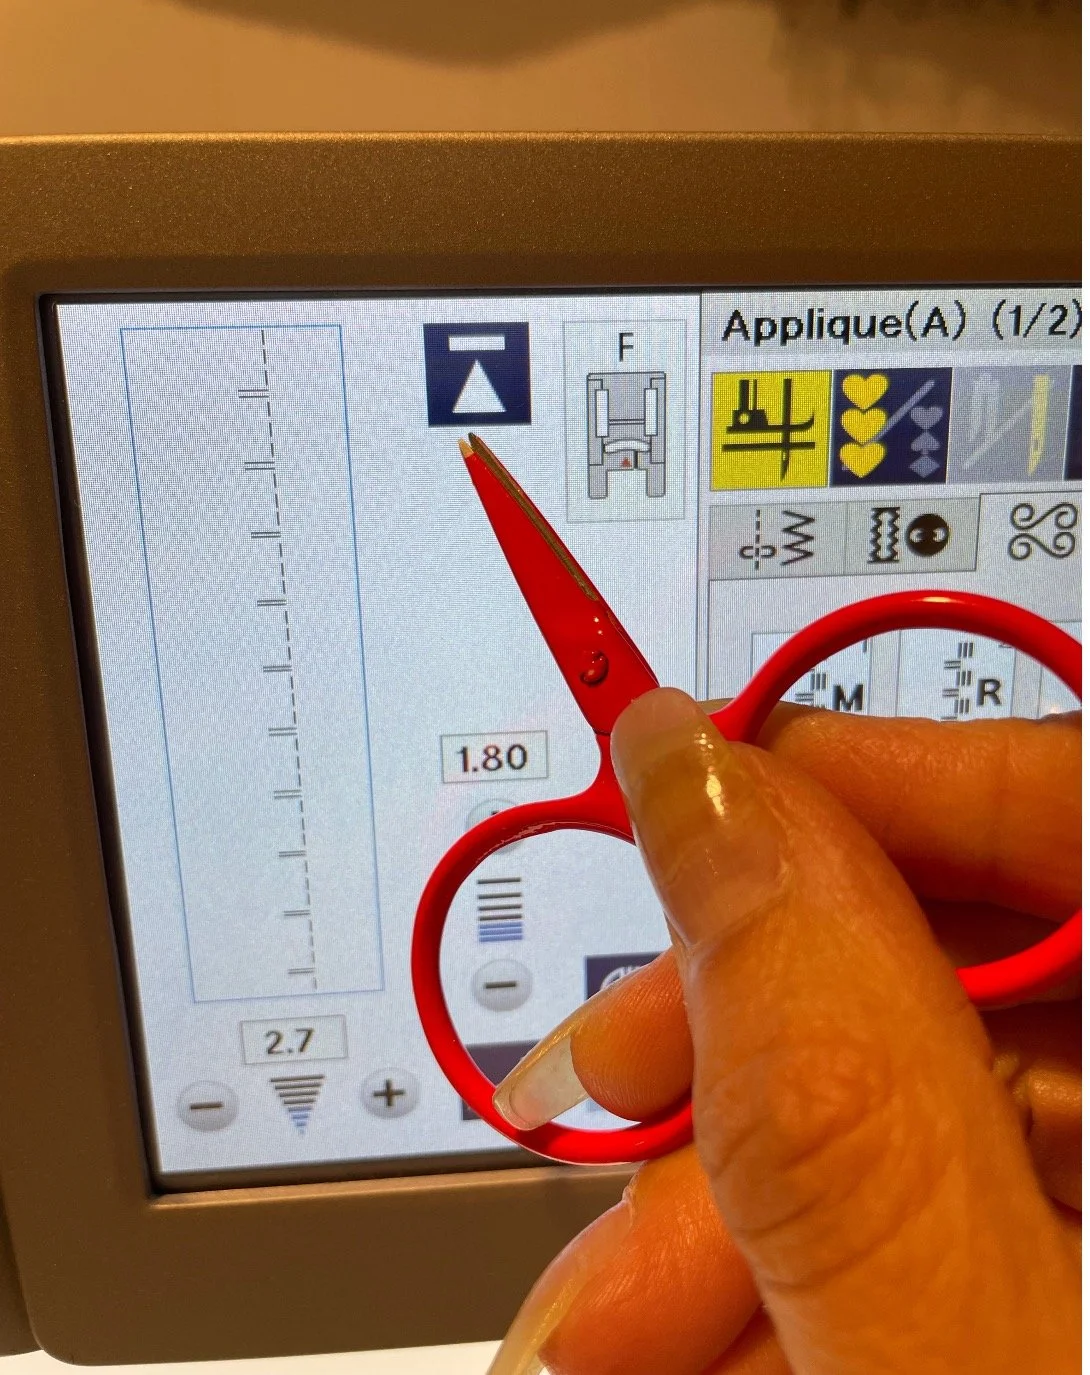
9. Use the mirror image feature on your M7 Continental to your benefit. It allows you to sew on the left side of your project without rotating a large piece. It maintains your stitch length and width. I show you this on the photos below. All stitch settings appear on the screen.

mirror image function

10. The “begin again” button (photo below), helps applique-ing around sharp edges by restarting the stitch sequence so that the work remains tidy. Hint: engage the automatic foot lift (highlighted below). Foot lifts when you stop sewing and needle stays in the downward position; pivoting is a breeze!
11. Continue stitching around all the leaves.
I like applique but I will admit that I’m still learning and have a way to go in this practice. Be patient and kind to yourself as you experiment. Hint: If you use coordinating thread to applique, you will not see any imperfections. I wanted you to see on my sample below that I had a “miss” towards the tip of the leaf. I chose to leave it as a reminder that practice is always a good thing. Have fun with this project!

You can see that this project is versatile, and the technique can be added to other home décor items and garments. You can use fancy applique stitches built into your sewing machine or raw edge applique for a speedier project.
Even better, add leaves to your homemade greeting cards this holiday season and mail to your loved ones from near and far, to remind them that good cheer is like falling leaves.
It can travel far.
My very best greetings to you and thanks for checking out this project.
